Monday, June 15, 2009

Malai Kofta - Cheese/Paneer Dumplings in Gravy

Malai Kofta - Paneer/Cheese Dumplings in Gravy

On one of my daily travails around the internet, I discovered Maria's blog which is a delightful collection of recipes and South Asian delicacies. There was an interesting 2-in-1 recipe she had for paneer balls, which could be served up as an appetizer, and then an elegant creamy curry that then utilized said dumplings again. This I had to try, especially since I was giddy from having some freshly made paneer ready to go.

Ooops, Paneer. Gots to have some to make this recipe.

But before you all get your bloomers in a twist and blow off this recipe, the Indian version of cottage cheese is surpisingly easy to make at home - and so now that I have mastered the feat of making my own paneer, I don't recommend using the store bought paneer cubes that you see languishing in Asian grocery store freezers. Unless there is someone (emphasis on the ONE in someone) out there who can prove me otherwise, store bought paneer has always tasted like a subtle mixture of chalk and cardboard. And since I have eaten both earnestly in my heady youth, I can attest to that review strongly.


Step 1 - Paneer Dumplings (adapted from Maria's Menu blog)
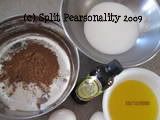
Ingredients
1 cup crumbled Paneer (cottage cheese)
2 medium Potatoes (boiled & mashed)
Crushed pepper - 1 heaped tsp
Red Chilli flakes - 1 heaped tsp
Garam masala - 1/2 teaspoon
Cornflour - 1-2 tablespoon
Salt - to taste
Oil - for frying

1. Mix potatoes and paneer together in a bowl. I like to do this when the potatoes are still warm so that the paneer cheese gets to melt slightly
2. Add all the seasonings and salt - adjust to taste.
3. Add cornflour and mix thoroughly - this is to help bind the mixture.
4. Form small balls or patties.
5. Fry lightly in hot oil. I chose not to deep fry, but ended up browning the dumplings a little.


At this stage, you may end up scoffing up the paneer balls as they are tasty little treats in of themsleves. Try them with a chilli sauce or dip.


Step 2. Gravy for the Malai Kofta Curry (reproduced entirely from Marias Menu blog)


2 medium onions - sliced
Tomato puree - made from 2,3 tomatoes
Gingergarlic paste - 1 tablespoon
Turmeric powder - 1 teaspoon
Coriander powder - 1 tablespoon
Chilli powder - 1 tablespoon
Garam masala - 2 teaspoon
Cream - 1 cup


1.Cook sliced onions in 2 cups water. Make sure you have the vent fan going, this is going to "smell" a little...
2.Once the onions have cooked (they will look blanched and lighter in color), drain the water completely and grind the onions into a smooth paste.
3.Heat oil in a pan and saute onion paste.
4.After 5 minutes add ginger garlic paste and saute for 2,3 minutes.
5.Add all the spice powders and stir for 5 minutes or until the oil starts forming a layer on top.
6.Add tomato puree and once the puree is mixed well in the gravy add the cream.
7.After 5 minutes, remove from heat. Spread prepared koftas in a plate and pour the gravy over it.

This is best served with a mixed fried rice or Indian bread like Naan or Paratha.

Friday, June 12, 2009

Ginger Honey Hoisin Chicken

Ginger Honey Hoisin Chicken
This recipe appeared in our local newspaper's Foodie section which highlighted recent winners in this year's National Chicken Cooking Contest, held at the Culinary Institute of America - San Antonio. This little gem was submitted by Ruth Kendrick from Ogden, Utah and what drew me to trying it out myself was
a) it used thigh meat, I really don't have much passion for chicken breast meat
b) it had ingredients that were all on hand and I didn't have to do the mad dash to the grocery store
c) well, it just darn looked good.

Loved it! I like the sauce that it results in, so its a perfect pairing with white rice or noodles. I served mine up with plain rice stick noodles and blanched broccoli. The kids had seconds. C'mon now - that should be testament enough.

Ginger Scented Honey Hoisin Chicken Thighs - Ruth Kendrick - (as appeared in Houston Chronicle Flavor section)
1 Tbsp cooking oil
8 boneless,skinless chicken thighs
1/4 cup soy sauce
1/4 cup honey
1/4 cup hoisin sauce
1/4 cup chicken broth
2 Tbsp grated fresh ginger
1/2 tsp pepper
1/4 cup toasted sesame seeds (I omitted, purely because I forgot)
1/4 cup sliced green onions

1. Preheat oven to 325 degrees
2.Add oil to a skillet big enough to hold allthe chicken. Over medium heat, add chicken and lightly brown on all sides.
3.In a small saucepan, mix soy sauce, honey, hoisin, chicken broth, ginger and pepper. Bring mixture to boil and simmer to reduce sauce (I preferred to have a little sauce to accompany the chicken, so I did not reduce much). Pour sauce over chicken to coat, and add to a baking dish.
4. Bake in oven for about 10-15 minutes, or until internal temperature is > 165 degrees.
5. Stir in sesame seeds and green onions, serve with plain white rice or noodles.
(Because of the variety of sauces used, there wasn't a need to add salt, but add to taste if required...)

Thursday, June 11, 2009

Summer Fruit Kuchen

Summer Fruit Kuchen
With grocery stores now brimming with summer produce, it was a no-brainer for me to try this recipe that caught my eye in Woman's Day magazine. A Kuchen is a buttery cake with a crumb topping, usually chock full of fruit, and it hails from Germany, though some Romanians also lay claim to its ancestry.
This cake is super easy to whip up, and it was devoured in my household the day it was made. It was so good, I made it for the better half's birthday, and stuck a candle it. Yes, I'm manipulative.
Lots of butter, but maybe the hint of fruit makes this somewhat healthy? But coming back to reality, I used peach, plum and blueberries as the recipe originally calls for, but this cake would be versatile with almost anything. Apples would be a great substitute.

Summer Fruit Kuchen - Source - Woman's Day Magazine - July 2009
1 1/2 cups all-purpose flour
1 tsp baking powder
1/4 tsp cinnamon powder
1/4 tsp salt
1 1/2 sticks softened unsalted butter (3/4 cup)
3/4 cup sugar
2 eggs
1 1/2 tsp vanilla extract
1/3 cup milk

Fruit:
1 1/2 cup blueberries
1 ripe peach, pitted and cut in wedges
1 ripe plum, pitted and cut in wedges

Crumb Topping:
3 Tbsp all-purpose flour
3 Tbsp light brown sugar
2 Tbsp unsalted butter
1/4 tsp cinnamon powder

Optional: Confectioners sugar for dusting (I omitted)

1. Heat oven to 350 degrees F. Line a 9 in. square baking pan with non-stick foil (or spray lightly with non-stick cooking spray).
2.Mix all dry ingredients in a bowl.
3. Beat butter and sugar till smooth.
4. Beat in eggs and vanilla to butter mixture until just combined.
5. On low speed, gradually add flour mixture and milk until blended.
6. Fold in 1/2 of the blueberries into the batter.
7. Pour batter into prepared cake pan.
8. Scatter remaining blueberries onto batter, and arrange plum and peach slices on top.
9. Prepare Topping -
In a small bowl, rub all ingredients for topping with fingers till it resembles clumps and the butter has been distributed evenly.
10.Bake 55 - 60 minutes or until a wooden pick inserted in the middle comes out clean. (The cake will rise slightly during baking).
11. Cool cake, lift out of pan by holding the ends of the foil.
12. Nom, nom, nom :-)

Wednesday, May 6, 2009

Barefoot Bloggers - Croque Monsieur

Take a Grilled Ham and Cheese Sandwich and hit it out the ballpark................................
Croque Monsieur
Yes folks, thats what happens when the French take an American staple like good ol' grilled ham and cheese. They would use artisan bread (oui, oui), and high end ham (mon dieu), and then slather the sammies with a Gruyere white sauce (no less, mes amis), and if that didn't block your arteries, go ahead and sprinkle Parmesan all over and gently broil so that you have heaven melting in your mouth every time you take a bite.


Once a year, that is.


After counting all the calories in this, thats probably how many times I'll be making it, but oh boy - do I WANT to make it.
Yes! Yes! Yes!
Lipitor! Crestor - thou art my new found friends.....


Thank you Kathy of All Food Considered for choosing this deliciously good sandwich for April's recipe for the Barefoot Bloggers. Yes, I am ridiculously late in posting this.....


Ingredients


2 tablespoons unsalted butter
3 tablespoons all-purpose flour
2 cups hot milk
1 teaspoon kosher salt
1/2 teaspoon freshly ground black pepper
Pinch nutmeg
12 ounces Gruyere, grated (5 cups)
1/2 cup freshly grated Parmesan
16 slices white sandwich bread, crusts removed (I used a Vienna wheat loaf)
Dijon mustard
8 ounces baked Virginia ham, sliced but not paper thin (I used regular deli smoked ham)


Directions
1. Preheat the oven to 400 degrees F.
2. Melt the butter over low heat in a small saucepan and add the flour all at once, stirring with a wooden spoon for 2 minutes.
3. Slowly pour the hot milk into the butter–flour mixture and cook, whisking constantly, until the sauce is thickened.
4. Off the heat add the salt, pepper, nutmeg, 1/2 cup grated Gruyere, and the Parmesan and set aside.
5. To toast the bread, place the slices on 2 baking sheets and bake for 5 minutes. Turn each slice and bake for another 2 minutes, until toasted.
6. Lightly brush half the toasted breads with mustard, add a slice of ham to each, and sprinkle with half the remaining Gruyere.
7. Top with another piece of toasted bread.
8. Slather the tops with the cheese sauce, sprinkle with the remaining Gruyere, and bake the sandwiches for 5 minutes.
9. Turn on the broiler and broil for 3 to 5 minutes, or until the topping is bubbly and lightly browned.
Serve hot.

Tuesday, April 21, 2009

Spring Sparkling Punch

I was looking for a go-to reliable fruity (and pink-ish hued) punch recipe for a recent ladies party - and this one hit the spot!
Sparkling Spring Punch
Southern Living Magazine - April 2007

Yield:
I made this in a standard size punch tureen ~approx 1.5 Gal

Ingredients:
2 (46 oz) cans pineapple juice
1 (12 oz) can pink lemonade concentrate - thawed
1 (12 oz) can frozen strawberry daiquiri mix concentrate - thawed
2 (1 L) bottles ginger-ale

Garnish - lemon and orange slices

Method:
1. Mix first three ingredients and chill in fridge for an hour.
2. Add the ginger-ale to the mix prior to serving, and garnish.

Verdict:
Fruity, non-alcoholic, easily put-together punch - perfect for a ladies or kids party.

Friday, April 3, 2009

Tandoori Chicken

Tandoori Chicken
I once attempted to make tandoori chicken with a jar of ready-made tandoori paste.
Result : Never will I do that again, though I did get that fiery red color thing going, more on my dish towels and countertops than the actual chicken,.

Fast forward to a year ago, where I saw a review of a Williams Sonoma recipe on the now closed
Trial and Errors blog (Nabeela, Nabeela, oh where art thou?) which etched itself firmly in the back of my head as The Recipe To Try If Ever...

I have to giggle though. Ironically, I defaulted to an American cookbook for a recipe of the most popular item in any Indian restaurant, both on and off the sub-continent. And as if stars collided, I also chose to post on tandoori chicken the same week
HE did. OK, not that I'm proposing a recipe duel of sorts, but the recipe below was GOOD. Thanks Nabeela, for sharing, even though I don't know how to get that across to you anymore =(.

My Rating: 4 out of 5
Gripes: Requires previous day prep, so don't try to pull this one out for a surprise treat.
Glows: Restaurant style chicken right out of your humble oven

Adapted from Williams Sonoma - Essentials of Roasting and
Trial and Error blog

Ingredients:
8 chicken legs , skins removed
1/2 cup yogurt
1/3 onion, cut into chunks
2 serrano chilis, cut into thick rings
mint leaves from 4-5 sprigs
1 tbsp ginger-garlic paste
1/2 tsp turmeric
1 tsp ground cumin
1 tsp ground coriander
1 to 1 1/2 tsp salt
1/2 tsp red chilli powder
1 tsp garam masala
1/4 tsp ground pepper
OPTIONAL - 1/4 cup tomato ketchup or tomato sauce
OPTIONAL - 1 drop red food color
Glaze:

1 tbsp butter
1-2 tbsp lime juice
Method:


  1. Make the marinade by blending or processing in a food processor yogurt, onion, serrano, mint, ginger-garlic, turmeric, cumin, coriander, salt, chilli powder, garam masala, ground pepper, food color and tomato ketchup/sauce. Blend to a smooth puree.
  2. Taste for salt and adjust. The marinade should be a little on the salty side so that the meat absorbs it.
  3. Rinse the legs. Using a sharp knife, make a cut to the bone around the bottom of the drumstick, about 3/4 inch from the end. Remove the flesh and any tendons. This will ensure the meat will contract in a nice clump when you bake it. (Note - I didn't do this, the chicken looks like a giant lollipop when you do this, I left the tendons on.)
  4. Slash 3-4 cuts on each leg to the bone to help the marinade penetrate further.
  5. Place the chicken legs in a ziploc bag or bowl and pour in the marinade. Make sure the marinade covers the chicken pieces and gets into all the slashes.
  6. Marinate for 12-24 hours in the fridge.
  7. Take the chicken out of the fridge 30 minutes before roasting.
  8. Preheat the oven to 500 F. You need this high temperature since we are trying to replicate a tandoor oven which can go to very high temperatures.
  9. Take out the chicken from the marinade, place on the roasting rack and roast in oven for about 20-25 minutes, till the juices run clear.
  10. Melt butter and add lime juice.
  11. Brush butter-lime mixture over chicken before serving (it's best to serve the chicken hot).

Saturday, March 28, 2009

Barefoot Bloggers - Tomato and Goat Cheese Tarts

Tomato and Goat Cheese Tarts
I'm a little late to post the final March recipe for the Barefoot Bloggers, the chosen recipe was for Tomato and Goat Cheese Tarts as chosen by Anne of Anne Strawberry.

And given most everyone else in the BB group has posted their recipes online, that may explain why there was not even one box of puff pastry available in my local grocery store yesterday.

Barefoot Bloggers causes a run on frozen pastry?...I can see the headlines tomorrow...

OK, well, I tried to have a sensational excuse for why I had to resort to puff pastry shells - and the mini-sized ones to boot (!) instead of the pastry sheets called for in the original recipe. So this recipe had two firsts for me - I got to work with puff pastry shells and I got to try herb flavored goat cheese.


Modifications
  • I used chicken stock instead of wine
  • I added a large pinch of red chilli flakes to the onions as they caramelized to pack some heat, and a little oregano along with the basil
Verdict
I don't know why I've breezed over goat cheese before, perhaps the word "goat" didn't resonate well with me?They are my least favorite farm animal...
Goat cheese does have a slightly sharp taste, but when melted in layers of flaky pastry accompanied with golden onions and some tomato - it was mmmm...lip-smacking goodness.
I used a brand of goat cheese called
Chavrie - garlic and basil flavored.

And the mini shells - I'll pass on them and go for the real pastry sheets next time - unless I have Lilliputians showing up for a soiree.

Thank you Ina! Thank you Anne!
This recipe is a keeper - I have my cousin's bridal shower coming up soon, and these beauties are definitely going to be making an appearance.


Tomato and Goat Cheese Tarts


1 package (17.3 ounces/2 sheets) puff pastry, defrosted


Good olive oil
4 cups thinly sliced yellow onions (2 large onions)
3 large garlic cloves, cut into thin slivers
Kosher salt and freshly ground black pepper
3 tablespoons dry white wine
2 teaspoons minced fresh thyme leaves
4 tablespoons freshly grated Parmesan, plus 2 ounces shaved with a vegetable peeler
4 ounces garlic-and-herb goat cheese (recommended: Montrachet)
1 large tomato, cut into 4 (1/4-inch-thick) slices
3 tablespoons julienned basil leaves


Directions
1. Unfold a sheet of puff pastry on a lightly floured surface and roll it lightly to an 11 by 11-inch square. Using a 6-inch wide saucer or other round object as a guide, cut 2 circles from the sheet of puff pastry, discarding the scraps. Repeat with the second pastry sheet to make 4 circles in all. Place the pastry circles on 2 sheet pans lined with parchment paper and refrigerate until ready to use.
2. Preheat the oven to 425 degrees F.
3. Heat 3 tablespoons of olive oil in a large skillet over medium to low heat and add the onions and garlic. Saute for 15 to 20 minutes, stirring frequently, until the onions are limp and there is almost no moisture remaining in the skillet. Add 1/2 teaspoon salt, 1/4 teaspoon pepper, the wine, and thyme and continue to cook for another 10 minutes, until the onions are lightly browned. Remove from the heat.
4. Using a sharp paring knife, score a 1/4-inch-wide border around each pastry circle. Prick the pastry inside the score lines with the tines of a fork and sprinkle a tablespoon of grated Parmesan on each round, staying inside the scored border.
5. Place 1/4 of the onion mixture on each circle, again staying within the scored edge.
6. Crumble 1 ounce of goat cheese on top of the onions. Place a slice of tomato in the center of each tart. Brush the tomato lightly with olive oil and sprinkle with basil, salt, and pepper.
7. Finally, scatter 4 or 5 shards of Parmesan on each tart.
8. Bake for 20 to 25 minutes, until the pastry is golden brown. The bottom sheet pan may need an extra few minutes in the oven. Serve hot or warm.

Tuesday, March 24, 2009

No Kitchen - No Food!

I'm having kitchen work done, and have no access to my stove and sink - so unless I start doing reviews of microwave dinners - see you (all 2 of you fine selves) next week!

Wednesday, March 18, 2009

Barefoot Bloggers - March Bonus Recipe - Brownie Pudding

I started this blog, went into hiatus, slapped myself back into action, and the first thing I did was join a group.One with deadlines.
But - we LOVE all things
Ina, and so, I rolled up my sleeves, surveyed the pantry, and realised I could almost pull this one off without a 3 a.m. jaunt to the grocery store.

The recipe in question is
Brownie Pudding selected by Tia of Southern, Eh? for the March Bonus Recipe Challenge from the Barefoot Bloggers.

The original recipe called for 4 eggs, and as luck would have it, I only had 2 left in the fridge.
=(
Knowing full well that any further procrastination would kill this post, I went ahead and halved the original recipe. I also did not have framboise, which is an optional ingredient in the original recipe, so to add some kick, I substituted coffee powder.

Modifications:

  • I halved the original recipe
  • I replaced framboise liqueur with 1 tsp instant coffee powder
  • I used vanilla essence (blasphemy!) because I didn't have vanilla bean on hand
Photobucket
Cook's Notes:
The original recipe was straightforward. I don't own a stand mixer and used a hand-held beater. While I was first puzzled why the pudding had to be baked in a bain-marie, I figure that is what is needed to get the pudding-like consistency.

Brownie Pudding

1/2 pound (2 sticks) unsalted butter, plus extra for buttering the dish

4 extra-large eggs, at room temperature
2 cups sugar
3/4 cup good cocoa powder
1/2 cup all-purpose flour
Seeds scraped from 1 vanilla bean
1 tablespoon framboise liqueur, optional
Vanilla ice cream, for serving


Directions
1. Preheat the oven to 325 degrees F. Lightly butter a 2-quart (9 by 12 by 2-inch) oval baking dish. Melt the 1/2 pound of butter and set aside to cool.
2. In the bowl of an electric mixer fitted with the paddle attachment, beat the eggs and sugar on medium-high speed for 5 to 10 minutes, until very thick and light yellow. Meanwhile, sift the cocoa powder and flour together and set aside.
3. When the egg and sugar mixture is ready, reduce the speed to low and add the vanilla seeds, framboise, if using, and the cocoa powder and flour mixture. Mix only until combined. With mixer still on low, slowly pour in the cooled butter and mix again just until combined.
4. Pour the brownie mixture into the prepared dish and place it in a larger baking pan. Add enough of the hottest tap water to the pan to come halfway up the side of the dish and bake for exactly 1 hour. A cake tester inserted 2 inches from the side will come out 3/4 clean. The center will appear very under-baked; this dessert is between a brownie and a pudding.
5. Allow to cool and serve with vanilla ice cream.


Photobucket

Since I had halved the recipe, I turned off the oven after 50 minutes, and removed the pudding from the oven 5 minutes later.
Verdict:
Crisp brownie-like topping with a gooey, almost fudge-like intense chocolate pudding below. This recipe is a keeper! I'm glad I tried it, and wish I could have seen the episode on Food Network when it aired just to see what Ina's version looked like.

Warning - it is a sugar-high inducer, I think I might knock down the amount of sugar the next time, after a few spoonfuls, I had a little aftertaste on my palate - which may also have been due to the intense cocoa flavor.
Ina Garten's Brownie Pudding
I prefer to serve this warm, but because of the brownie flavor, I opted to have mine with a glass of milk (slurp!) rather than ice-cream.

Wednesday, March 11, 2009

How To...Make a Substitute for Buttermilk

Many recipes, especially for lovely baked goods, often call for buttermilk, and I've been caught dashing out to the grocery store to get a pint, whereas the recipe only called for half a cup. Invariably, I'm usually left with a pitiful half bottle of buttermilk in the fridge that just waits to get tossed in the trash.
I recently found a subsitute for buttermilk that can be made with what you probably already have in the kitchen, and this way, I never have to have drag myself out to the store to grab a pint whenever a recipe calls for it.

To make 1 cup of buttermilk:

What you need:
1 cup milk
1 tbsp white vinegar or lemon juice

Method:
1. Pour 1 tbsp of white vingear in a bowl.
2. Add the milk to the bowl.
3. Let the mixture sit for 5 minutes - you'll then have buttermilk ready to use in your recipe!